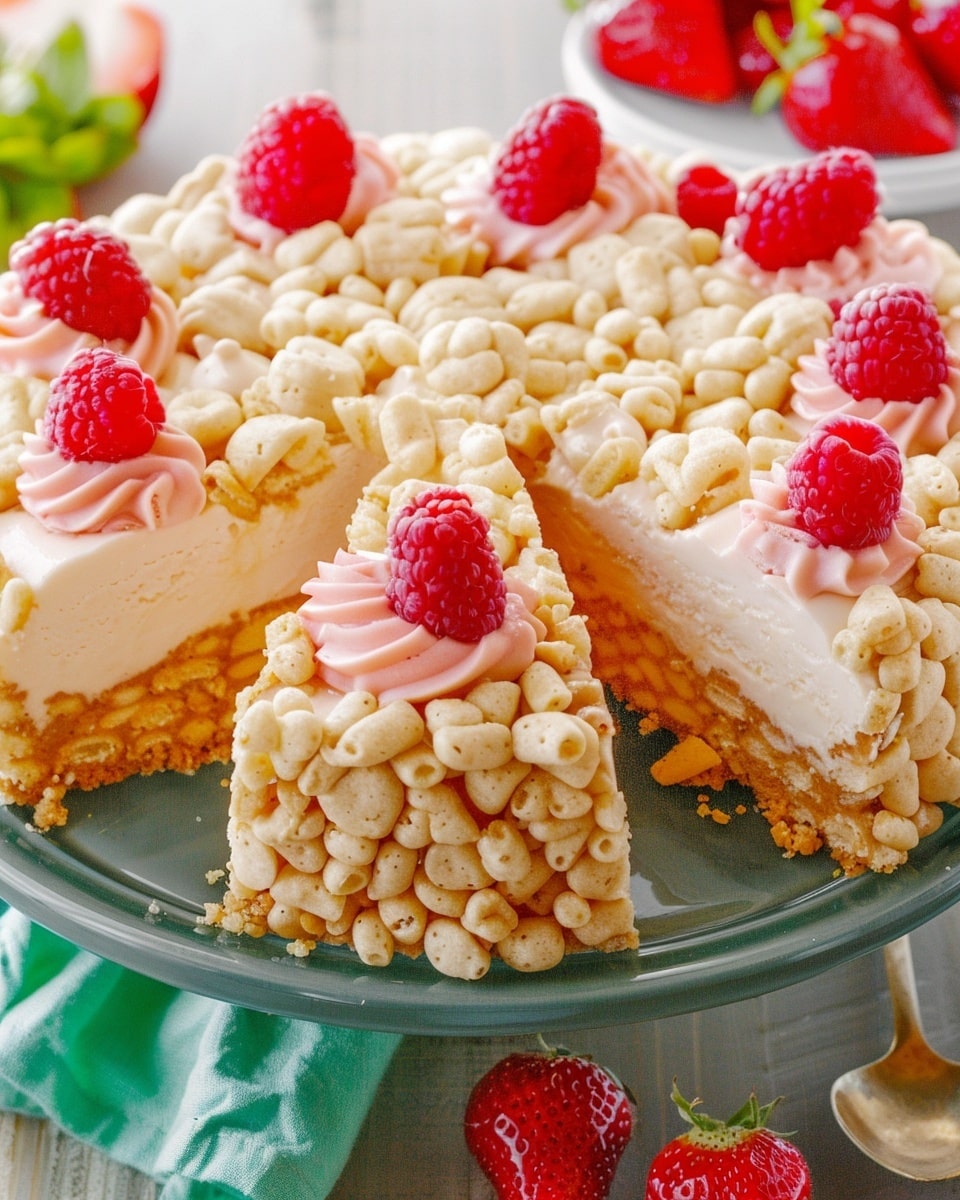
This Vegan Rice Krispie Treat Cheesecake combines the nostalgic crunch of crispy rice cereal treats with a rich and creamy dairy-free cheesecake layer. It’s a fun no-bake dessert that delivers the perfect balance of chewy, crunchy, smooth, and sweet textures in every bite. Ideal for birthdays, gatherings, or weekend treats, this dessert is both eye-catching and surprisingly easy to prepare.
Why You’ll Love This Recipe
Completely dairy-free and vegan-friendly
No baking required for an easy dessert option
Combines two classic desserts into one irresistible treat
Perfect balance of creamy cheesecake and crispy cereal texture
Great make-ahead dessert for parties and celebrations
Customizable with toppings and flavor variations
Kid-friendly and crowd-pleasing
Ingredients
(Tip: You’ll find the full list of ingredients and measurements in the recipe card below.)
For the Rice Krispie Base:
5 cups vegan crispy rice cereal
1 bag (10 ounces) vegan marshmallows
4 tablespoons vegan butter
1 teaspoon vanilla extract
For the Cheesecake Filling:
2 cups raw cashews, soaked overnight
1 cup full-fat coconut cream
1/2 cup maple syrup
1/4 cup melted coconut oil
2 tablespoons lemon juice
1 teaspoon vanilla extract
1/4 teaspoon salt
For the Topping:
1/2 cup dairy-free chocolate chips
1 tablespoon coconut oil
Extra crushed cereal for garnish
Directions
Prepare an 8-inch springform pan by lightly greasing the sides and lining the bottom with parchment paper.
In a large saucepan over low heat, melt the vegan butter. Add the vegan marshmallows and stir continuously until smooth and fully melted.
Remove the saucepan from heat and stir in the vanilla extract. Add the crispy rice cereal and gently mix until evenly coated.
Press the cereal mixture firmly into the bottom of the prepared pan to create an even layer. Set aside to cool slightly.
Drain the soaked cashews and place them into a high-speed blender. Add coconut cream, maple syrup, melted coconut oil, lemon juice, vanilla extract, and salt.
Blend the mixture until completely smooth and creamy. This may take 2 to 3 minutes depending on your blender.
Pour the cheesecake filling over the rice cereal crust and spread evenly with a spatula.
Place the cheesecake into the freezer for about 3 hours, or refrigerate for at least 6 hours until fully set.
Melt the dairy-free chocolate chips with coconut oil until smooth. Drizzle over the chilled cheesecake.
Sprinkle extra crushed crispy rice cereal on top before slicing and serving.
Servings and timing
Servings: 10 slices
Prep Time: 25 minutes
Chill Time: 6 hours
Total Time: 6 hours 25 minutes
Variations
Add a layer of strawberry sauce for a fruity cheesecake version.
Stir mini dairy-free chocolate chips into the cheesecake filling for extra texture.
Use chocolate crispy rice cereal for a richer flavor.
Add peanut butter to the filling for a nutty twist.
Top with fresh berries or toasted coconut flakes for added freshness.
Create mini cheesecakes using muffin tins lined with cupcake wrappers.
Storage/Reheating
Store the cheesecake in an airtight container in the refrigerator for up to 5 days. For longer storage, freeze individual slices for up to 1 month. Allow frozen slices to thaw in the refrigerator for several hours before serving.
This dessert does not require reheating. For the best texture, serve chilled directly from the refrigerator.
FAQs
Can I make this cheesecake without cashews?
Yes, you can substitute soaked sunflower seeds or vegan cream cheese, although the texture may vary slightly.
Do I need a springform pan?
A springform pan works best for easy removal, but a regular cake pan lined with parchment paper can also work.
Can I use store-bought vegan whipped topping?
Yes, you can add vegan whipped topping before serving for extra creaminess.
Why do the cashews need to be soaked?
Soaking softens the cashews, helping them blend into a smooth and creamy filling.
Can I freeze the cheesecake?
Yes, this cheesecake freezes very well. Wrap slices individually for convenient storage.
What type of vegan marshmallows should I use?
Any gelatin-free vegan marshmallow brand will work for this recipe.
Can I make this gluten-free?
Yes, simply use certified gluten-free crispy rice cereal.
How long should the cheesecake chill before serving?
It should chill for at least 6 hours in the refrigerator or 3 hours in the freezer.
Can I add fruit toppings?
Absolutely. Fresh strawberries, raspberries, or blueberries pair beautifully with the cheesecake.
Is coconut flavor strong in this recipe?
The coconut flavor is mild and blends well with the creamy cheesecake texture.
Conclusion
Vegan Rice Krispie Treat Cheesecake is the perfect combination of crunchy cereal treats and silky cheesecake filling. This no-bake dessert is easy to prepare, incredibly satisfying, and ideal for any special occasion or casual sweet craving. With its creamy texture, crispy base, and customizable toppings, it’s a dessert everyone will want to make again and again.
Vegan Rice Krispie Treat Cheesecake is a creamy no-bake dessert layered over a chewy crispy rice cereal base. Combining nostalgic marshmallow cereal treats with rich dairy-free cheesecake filling, this fun and indulgent dessert is perfect for birthdays, parties, and make-ahead celebrations.
Ingredients
For the Rice Krispie Base:
5 cups vegan crispy rice cereal
1 bag (10 ounces) vegan marshmallows
4 tablespoons vegan butter
1 teaspoon vanilla extract
For the Cheesecake Filling:
2 cups raw cashews, soaked overnight
1 cup full-fat coconut cream
1/2 cup maple syrup
1/4 cup melted coconut oil
2 tablespoons lemon juice
1 teaspoon vanilla extract
1/4 teaspoon salt
For the Topping:
1/2 cup dairy-free chocolate chips
1 tablespoon coconut oil
Extra crushed cereal for garnish
Instructions
Lightly grease an 8-inch springform pan and line the bottom with parchment paper.
In a large saucepan over low heat, melt the vegan butter.
Add the vegan marshmallows and stir continuously until completely melted and smooth.
Remove from heat and stir in the vanilla extract.
Add the crispy rice cereal and mix gently until fully coated.
Press the cereal mixture firmly into the bottom of the prepared pan to form the crust layer.
Drain the soaked cashews and place them in a high-speed blender.
Add coconut cream, maple syrup, melted coconut oil, lemon juice, vanilla extract, and salt.
Blend until completely smooth and creamy.
Pour the cheesecake filling over the cereal crust and spread evenly.
Freeze for 3 hours or refrigerate for at least 6 hours until set.
Melt the dairy-free chocolate chips with coconut oil until smooth.
Drizzle the chocolate over the chilled cheesecake.
Sprinkle extra crushed crispy rice cereal on top before slicing and serving.
Notes
Soaking the cashews overnight creates the smoothest cheesecake texture.
Use certified gluten-free crispy rice cereal if needed.
Store leftovers chilled for the best texture.
Fresh berries or toasted coconut make excellent toppings.
Freeze individual slices for easy make-ahead desserts.