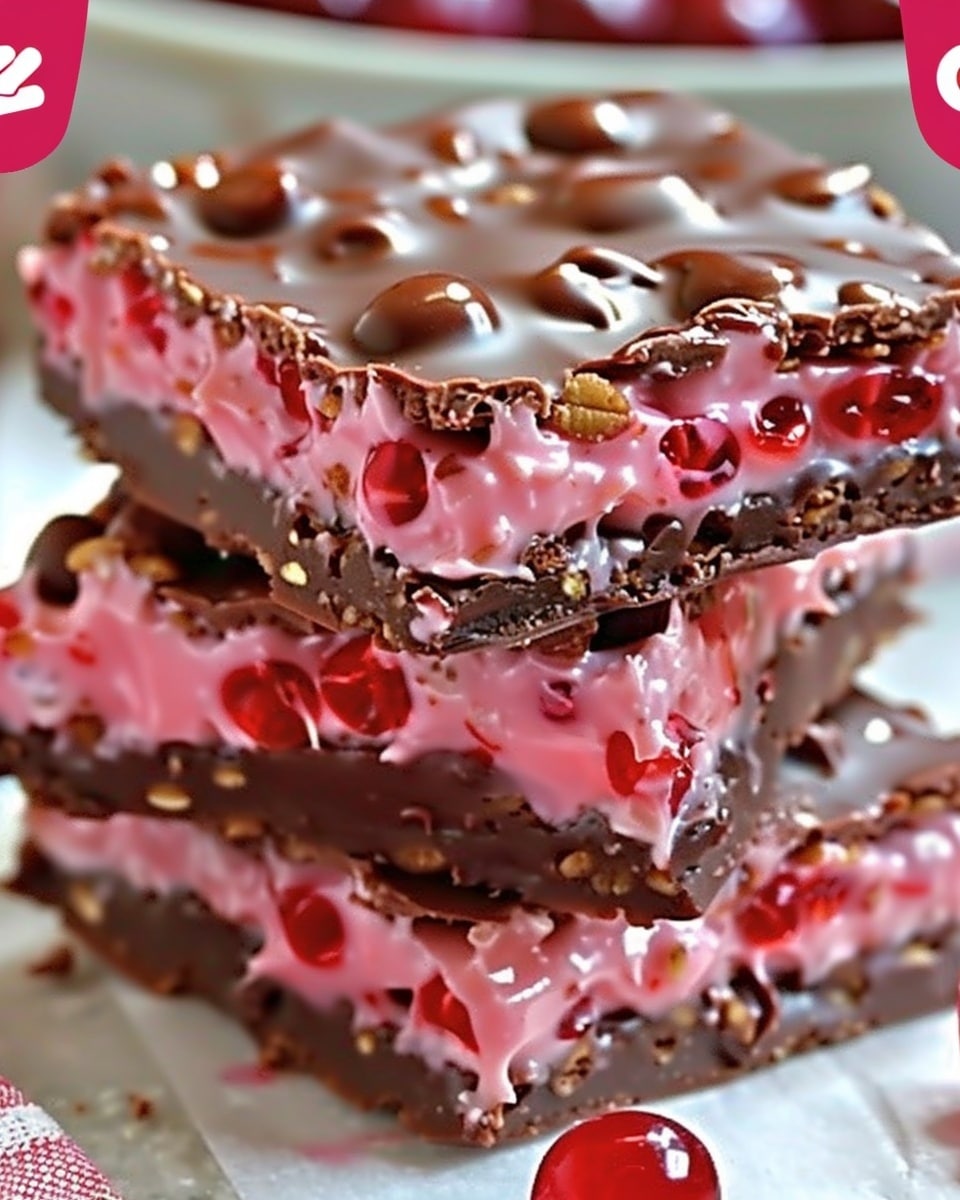
These No-Bake Cherry Chocolate Crispy Bars are a fun, fruity twist on classic crispy cereal treats. A chewy cherry-flavored base made with marshmallows and crispy rice cereal is topped with a smooth chocolate layer for a dessert that feels both nostalgic and fresh. Since there is no baking involved, they come together easily and make a great choice for parties, lunchbox treats, or a simple make-ahead dessert.
Why You’ll Love This Recipe
These bars are the kind of dessert that delivers big flavor with very little effort. The cherry layer is sweet, chewy, and bright, while the chocolate topping adds just enough richness to balance everything out. The contrast of textures is especially satisfying, with the soft marshmallow base and the gentle snap of the set chocolate on top.
You will also love how approachable this recipe is. It uses simple pantry ingredients, requires no oven time, and can be made ahead without any fuss. The bars slice neatly once chilled, which makes them easy to serve for gatherings or pack away for later. They are colorful, crowd-pleasing, and just different enough from standard cereal treats to feel special.
Ingredients
(Tip: You’ll find the full list of ingredients and measurements in the recipe card below.)
For the cherry crispy base:
4 tablespoons butter
1 bag miniature marshmallows, 10 ounces
6 cups crispy rice cereal
1 box cherry-flavored gelatin, 3 ounces
For the chocolate topping:
1 1/2 cups semi-sweet chocolate chips
2 tablespoons butter
Optional add-ins:
1/2 cup dried cherries, chopped
1/2 teaspoon vanilla extract
1 pinch salt
Directions
Grease a 9×13-inch pan lightly or line it with parchment paper so the bars are easy to lift out later.
In a large saucepan, melt the 4 tablespoons of butter over low heat. Once melted, add the miniature marshmallows and stir constantly until they are completely smooth. Keep the heat gentle so the marshmallows do not scorch.
Add the cherry-flavored gelatin powder to the melted marshmallow mixture and stir until the color and flavor are evenly distributed. If you are using vanilla extract or a pinch of salt, stir them in at this stage.
Remove the pan from the heat and immediately add the crispy rice cereal. If you want extra chewy bursts of fruit, fold in the chopped dried cherries now. Stir gently but thoroughly until all the cereal is coated with the cherry mixture.
Transfer the mixture to the prepared pan. Press it into an even layer using a greased spatula or lightly buttered hands. Do not pack it down too firmly or the bars may turn dense instead of soft and chewy.
Place the chocolate chips and 2 tablespoons of butter in a microwave-safe bowl. Heat in short intervals, stirring between each one, until the mixture is fully melted and smooth. You can also melt it over a double boiler if you prefer.
Pour the melted chocolate over the cherry cereal layer and spread it evenly to the edges. Let the bars rest at room temperature for a few minutes, then refrigerate until the topping is firm.
Once set, lift the bars out of the pan if lined with parchment, then cut into squares or rectangles and serve.
Servings and timing
This recipe makes about 12 to 16 bars, depending on how large you slice them.
Prep time: 15 minutes
Cook time: 10 minutes
Chill time: 30 to 45 minutes
Total time: about 55 minutes to 1 hour 10 minutes
These times make the recipe practical for same-day serving, but the bars are also excellent when made a few hours ahead.
Variations
For a deeper cherry flavor, stir chopped dried cherries into the base. This adds texture and a more natural fruit note.
For a softer topping, replace 2 tablespoons of the chocolate chips with the same amount of butter or a little coconut oil. This makes the top layer easier to bite into straight from the refrigerator.
You can also switch the chocolate style. Milk chocolate will make the bars sweeter and creamier, while dark chocolate gives them a more balanced finish.
If you want a more festive look, add a light sprinkle of chocolate curls or red candy sprinkles over the melted topping before it sets.
Storage/Reheating
Store the bars in an airtight container at room temperature for up to 2 days if your kitchen is cool. For longer storage, keep them in the refrigerator for up to 1 week.
Place parchment paper between layers if stacking to prevent the chocolate from sticking. For longer storage, freeze the bars in a freezer-safe container for up to 2 months. Thaw them in the refrigerator or at room temperature before serving.
These bars do not need reheating, but if they are very cold from the fridge, let them sit at room temperature for 10 to 15 minutes for the best texture.
FAQs
Can I use large marshmallows instead of miniature marshmallows?
Yes, but mini marshmallows melt more quickly and evenly. If using large marshmallows, weigh out the same amount.
What size pan should I use?
A 9×13-inch pan works best for evenly sized bars with a good thickness.
Can I make these bars ahead of time?
Yes, they are a great make-ahead dessert and can be prepared several hours in advance.
Do I have to refrigerate them?
Refrigeration helps the chocolate set faster and makes the bars easier to slice neatly.
Can I use dark chocolate instead of semi-sweet?
Yes, dark chocolate works very well and gives the bars a richer, less sweet finish.
Why are my bars hard?
They may have been pressed too firmly into the pan or the marshmallow mixture may have been overheated.
Can I add nuts?
Yes, chopped almonds or walnuts can add crunch if you want more texture.
Will the gelatin make the bars wet?
No, it blends into the melted marshmallow mixture and adds flavor and color without making the bars soggy.
Can I cut them into bite-size pieces?
Yes, this recipe works well for smaller party squares or dessert bites.
How do I get clean slices?
Chill the bars until firm, then use a sharp knife lightly greased or warmed under hot water and wiped dry.
Conclusion
No-Bake Cherry Chocolate Crispy Bars are a simple dessert with plenty of personality. The sweet cherry base, crisp cereal texture, and smooth chocolate topping come together in a way that feels playful, comforting, and easy to love. Whether you are making them for a holiday tray, a family snack, or a quick no-bake treat, these bars are a delicious way to serve something colorful and memorable.


