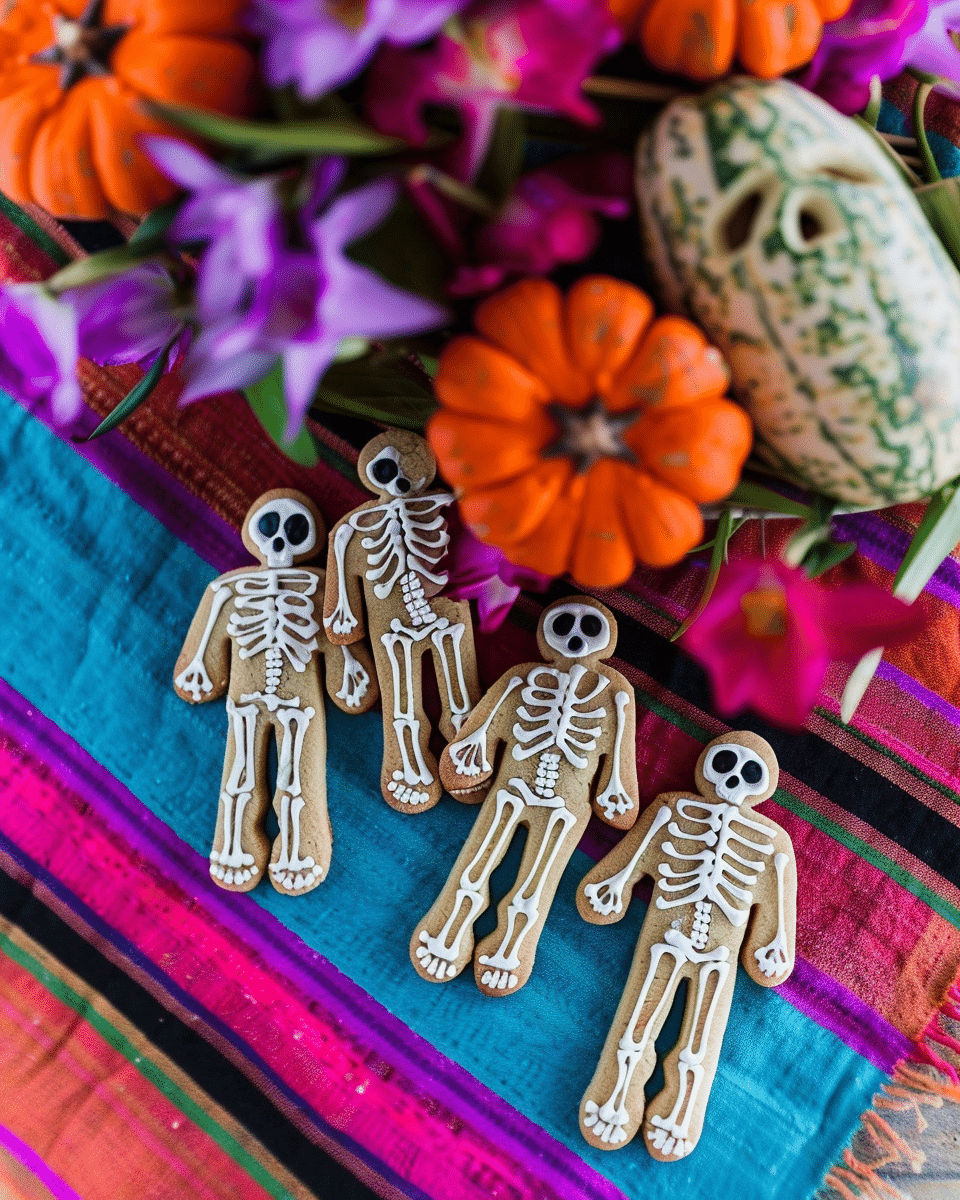
Halloween is the perfect time to have fun in the kitchen, and these Skeleton Halloween Sugar Cookies are as playful as they are delicious. I get to enjoy classic sugar cookies with a twist—vibrant frosting and spooky skeleton decorations that make them a hit for Halloween parties or just festive baking at home. These cookies not only look impressive but also have that soft, buttery flavor I love in a traditional sugar cookie.
Why You’ll Love This Recipe
I love how this recipe strikes a perfect balance between creativity and simplicity. The sugar cookie base is buttery and soft, just the way I like it, and the decorations let me personalize each one with fun Halloween colors and spooky skeleton designs. Whether I use candy eyes or pipe on bones with white chocolate, it’s a great way to get crafty in the kitchen—no fancy equipment required. Plus, it’s a great recipe to make ahead, decorate with kids, or bring to a Halloween gathering.
Ingredients
(Tip: You’ll find the full list of ingredients and measurements in the recipe card below.)
For the sugar cookies:
all-purpose flour
baking powder
salt
unsalted butter, softened
granulated sugar
large egg
vanilla extract (or a mix of vanilla and almond extract for a bakery-style flavor)
For the frosting:
powdered sugar
butter, softened
milk (adjust for consistency)
vanilla extract
gel food coloring (orange, purple, green, black, etc.)
For the skeleton decorations:
white chocolate chips or melting wafers
candy eyes
optional: white sprinkles or mini white chocolate bones
Directions
1. Make the Sugar Cookie Dough I start by whisking the flour, baking powder, and salt in a bowl. Then in a large mixing bowl, I cream the butter and sugar until it’s light and fluffy. I beat in the egg and vanilla, then slowly add the dry ingredients until a dough forms. I divide it in half, flatten into discs, and chill for at least 30 minutes.
2. Roll and Cut the Cookies Once chilled, I preheat the oven to 350°F (175°C). I roll out the dough on a floured surface to about ¼ inch thick and cut out skeleton shapes—or use gingerbread cutters or ovals if I plan to pipe the skeleton details later. I bake them on parchment-lined baking sheets for 8–10 minutes, just until the edges are set. I let them cool completely before decorating.
3. Make the Frosting In a bowl, I mix powdered sugar, butter, milk, and vanilla until the frosting is smooth. I divide it into smaller bowls and tint each with Halloween-colored gel food coloring. I frost each cookie and let the base layer set for around 10 minutes.
4. Add the Skeleton Details I melt white chocolate chips in short bursts in the microwave, stir until smooth, and transfer to a piping bag (or a zip-top bag with a small corner snipped). I pipe skeleton bones on wax paper and chill them for 5–10 minutes to harden, then gently place them on top of the frosted cookies. I also sometimes just pipe directly onto the cookies—it’s faster and still looks great.
5. Add Candy Eyes and Extras Using a dab of frosting or melted chocolate, I attach candy eyes to the skeleton faces. If I want to go all out, I add sprinkles, edible glitter, or white chocolate “bones” for extra flair.
Servings and timing
This recipe makes about 24 cookies, depending on the size of the cookie cutters I use. Prep time: 25 minutes Chill time: 30 minutes Bake time: 8–10 minutes Decorating time: 30–45 minutes (depending on detail level)
Variations
I like swapping vanilla for almond extract for a bakery-style flavor.
For an easier version, I use store-bought sugar cookie dough and ready-made colored icing.
I sometimes use melted candy melts in fun colors for the skeletons instead of white chocolate.
For a spooky twist, I color the dough itself using black or orange gel food coloring.
storage/reheating
Once decorated, I store the cookies in an airtight container at room temperature for up to 5 days. If I’m stacking them, I place parchment paper between layers to protect the decorations. I don’t need to reheat them, but if I want to make them in advance, I freeze the undecorated cookies for up to 2 months and frost them fresh after thawing.
FAQs
How can I make the skeleton details if I don’t have piping bags?
I just use a small zip-top bag and snip a tiny corner to pipe the white chocolate. It works great for basic shapes like bones and ribs.
Can I make the dough ahead of time?
Yes, I often make the dough the night before. I wrap it well and chill it in the fridge for up to 2 days, or freeze it for longer storage.
What kind of food coloring works best?
Gel food coloring gives me vibrant colors without thinning the frosting. I avoid liquid food coloring as it can make the icing runny.
Can I decorate these cookies with kids?
Definitely! I let them frost the base layer and use sprinkles and candy eyes. I usually handle the piping since it requires more precision.
Do I have to use white chocolate for the skeletons?
Nope—I sometimes use royal icing or even melted candy melts. Anything that hardens well and is pipeable will work for the skeleton bones.
Conclusion
These Skeleton Halloween Sugar Cookies let me celebrate the spooky season with a sweet twist. They’re festive, fun to decorate, and delicious to eat. Whether I’m making them for a Halloween party or just having a fun afternoon in the kitchen, they never disappoint. With easy dough, vibrant frosting, and spooky skeletons, these cookies are a Halloween tradition I look forward to year after year.
These Skeleton Halloween Sugar Cookies combine buttery, soft sugar cookies with colorful frosting and spooky skeleton decorations. Perfect for Halloween parties or festive family baking, they’re as fun to make as they are to eat.


