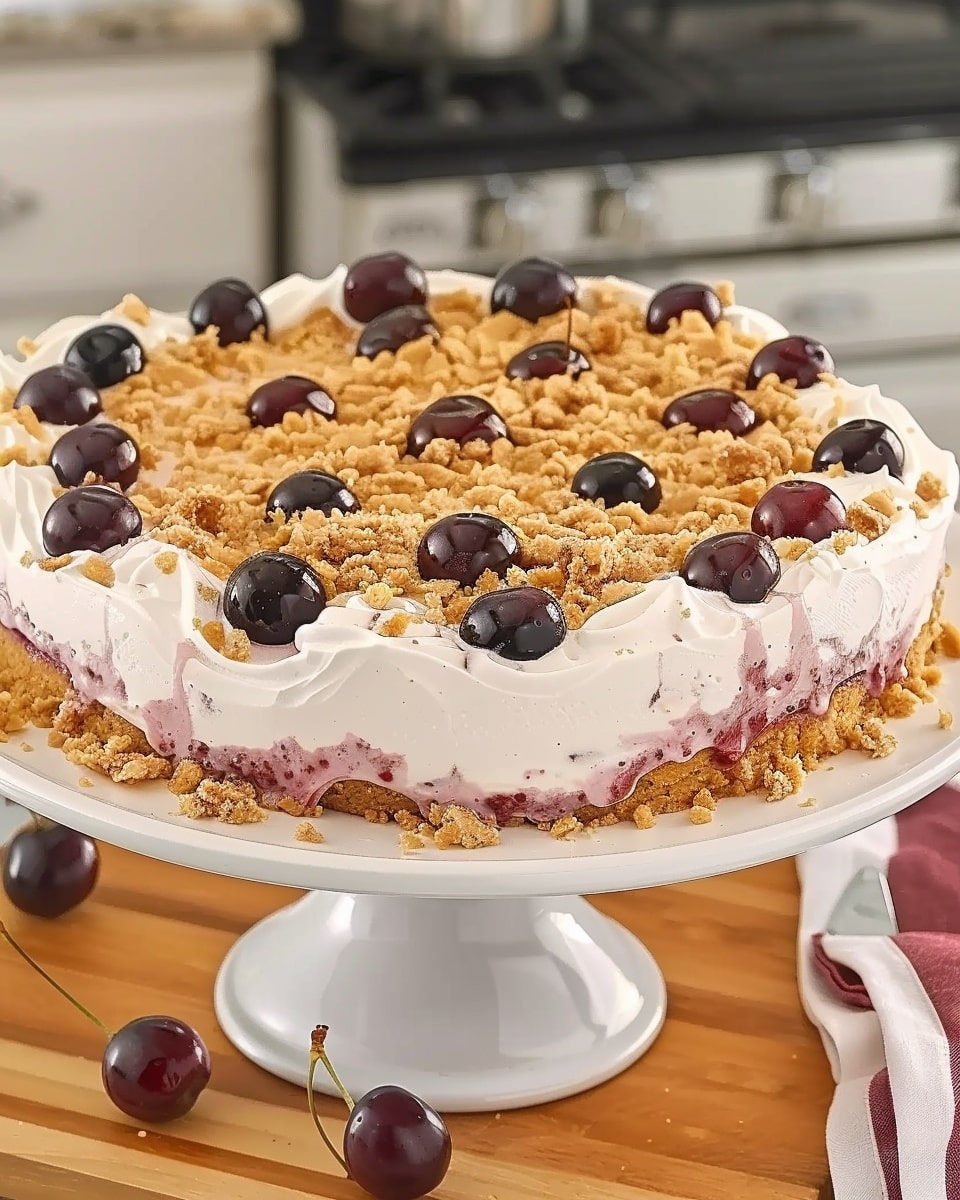
This No-Bake Cherry Cheesecake is a creamy, refreshing dessert that delivers all the rich flavor of traditional cheesecake without ever turning on the oven. With a buttery graham cracker crust, a light and velvety cream cheese filling, and a glossy cherry topping, it’s the perfect make-ahead treat for warm days, busy schedules, or whenever you need an effortless crowd-pleaser.
Why You’ll Love This Recipe
No oven required, making it ideal for warm weather
Quick 10–12 minutes of prep time
Simple pantry-friendly ingredients
Light, mousse-like texture from freshly whipped cream
Perfect make-ahead dessert for gatherings
Beautiful layered presentation with minimal effort
Beginner-friendly and nearly foolproof
Easily customizable with different toppings
This recipe combines convenience with classic flavor, giving you a dessert that tastes bakery-made while being incredibly simple to prepare at home.
Ingredients
(Tip: You’ll find the full list of ingredients and measurements in the recipe card below.)
For the crust:
1 ¼ cups graham cracker crumbs (about 10–12 full sheets, finely crushed)
¼ cup unsalted butter, melted
¼ cup granulated sugar
For the filling:
1 (8-ounce) package full-fat cream cheese, softened to room temperature
1 cup powdered sugar, sifted if lumpy
1 teaspoon pure vanilla extract
1 cup cold heavy whipping cream (at least 35% fat)
For the topping:
1 (21-ounce) can cherry pie filling
Directions
Prepare the crust:
In a medium bowl, combine the graham cracker crumbs, melted butter, and granulated sugar. Mix until the texture resembles wet sand and holds together when pressed. Transfer the mixture into a 9-inch pie plate and press firmly into the bottom and slightly up the sides. Use the bottom of a measuring cup to compact it evenly. Refrigerate while preparing the filling.
Make the filling:
In a large mixing bowl, beat the softened cream cheese until completely smooth and creamy. Add powdered sugar and vanilla extract, and continue beating until fully combined and fluffy.
In a separate chilled bowl, whip the cold heavy cream using an electric mixer until soft peaks form. Be careful not to overwhip. Gently fold the whipped cream into the cream cheese mixture in batches using a spatula, maintaining as much air as possible.
Assemble:
Spoon the filling into the chilled crust and smooth the top evenly. Cover loosely and refrigerate for at least 3 hours, preferably overnight, until fully set.
Finish:
Once set, spread the cherry pie filling evenly over the top. Slice with a sharp knife dipped in hot water for clean cuts. Serve chilled.
Berry swap: Replace cherry pie filling with blueberry, strawberry, or raspberry topping.
Citrus twist: Add 1 teaspoon lemon zest to the filling for a bright, fresh flavor.
Chocolate crust: Substitute graham crackers with chocolate cookie crumbs in the same measurement.
Fresh fruit version: Top with fresh strawberries, kiwi slices, or mixed berries instead of canned filling.
Lighter option: Use reduced-fat cream cheese and slightly reduce the powdered sugar for a less sweet version.
Nutty crust: Add 2 tablespoons finely chopped toasted almonds or pecans to the crust mixture.
Mini cheesecakes: Divide into muffin liners for individual servings.
Storage/Reheating
Store the cheesecake covered in the refrigerator for up to 4 days. Keep it tightly covered to prevent it from absorbing refrigerator odors.
For best texture, do not leave it at room temperature for more than 1–2 hours.
Freezing is possible: wrap tightly and freeze without the topping for up to 1 month. Thaw overnight in the refrigerator and add topping before serving.
This dessert does not require reheating and should always be served chilled.
FAQs
Can I make this cheesecake ahead of time?
Yes, it’s actually better when made a day in advance because it sets more firmly and slices cleanly.
Can I use store-bought whipped topping instead of heavy cream?
Yes, you can substitute 1 cup of whipped topping, though the texture will be slightly less rich and airy.
Why didn’t my cheesecake set properly?
It may not have chilled long enough, or the whipped cream may have been under-whipped. Make sure to chill at least 3 hours.
Can I use low-fat cream cheese?
Yes, but the texture will be softer and slightly less creamy.
Can I freeze the whole cheesecake?
Yes, freeze it without the cherry topping for best results. Thaw in the refrigerator before serving.
How do I prevent a crumbly crust?
Press the crust firmly into the pan and allow it to chill before adding the filling.
Can I use a springform pan instead of a pie plate?
Yes, a 9-inch springform pan works very well and makes slicing easier.
Is gelatin required for this recipe?
No, this version relies on whipped cream for structure and does not require gelatin.
Can I reduce the sugar?
You can reduce the powdered sugar slightly, but lowering it too much may affect the texture and stability.
How do I get clean slices?
Dip a sharp knife in hot water, wipe dry, and slice. Repeat between cuts for neat presentation.
Conclusion
No-Bake Cherry Cheesecake is the perfect combination of simplicity and elegance. With minimal effort and no baking required, you can create a creamy, refreshing dessert that looks impressive and tastes indulgent.
Whether you’re preparing it for a summer gathering, holiday celebration, or a simple family dessert, this timeless classic never fails to satisfy. Its smooth filling, buttery crust, and vibrant cherry topping make every bite a delightful balance of texture and flavor.
This No-Bake Cherry Cheesecake features a buttery graham cracker crust, a light and creamy whipped cream cheese filling, and a glossy cherry topping. It’s an easy, make-ahead dessert that delivers classic cheesecake flavor without using the oven.
In a bowl, mix graham cracker crumbs, melted butter, and sugar until combined. Press firmly into the bottom and slightly up the sides of a 9-inch pie plate. Refrigerate while preparing filling.
Beat softened cream cheese until smooth. Add powdered sugar and vanilla extract, and mix until creamy.
In a separate chilled bowl, whip heavy cream to soft peaks.
Gently fold whipped cream into the cream cheese mixture in batches until light and fluffy.
Spoon filling into chilled crust and smooth the top evenly.
Cover and refrigerate for at least 3 hours, preferably overnight, until fully set.
Spread cherry pie filling evenly over the top before serving.
Slice with a knife dipped in hot water for clean cuts and serve chilled.
Notes
Chill at least 3 hours for proper setting.
Do not overwhip the cream to avoid a grainy texture.
Freeze without topping for best results.
Press crust firmly to prevent crumbling.
Store covered in the refrigerator for up to 4 days.


