These No Bake Banana Pudding Cheesecake Bars are my go-to when I need a dessert that looks impressive but is incredibly easy to make. With no oven required, a buttery vanilla wafer crust, and a luscious banana pudding–flavored cheesecake filling, this dessert is creamy, cool, and nostalgic in the best way. Whether I’m hosting a summer BBQ, preparing for a potluck, or just craving something sweet during the week, these bars always hit the spot.
Why You’ll Love This Recipe
These bars check every box when I want a dessert that’s easy, delicious, and crowd-pleasing. I love how I can make them ahead of time and keep them chilled until serving. The filling is silky and rich with just the right amount of banana flavor, and the crust adds the perfect crunch. No oven, no hassle, just layers of creamy, banana-flavored goodness. Plus, they’re easy to customize for any occasion.
Ingredients
(Here’s a tip: Check out the full list of ingredients and measurements in the recipe card below.)
1 box (about 11 oz) vanilla wafer cookies – Crushed into fine crumbs for the crust. These bring that classic banana pudding taste and texture.
½ cup unsalted butter, melted – This binds the cookie crumbs together. I use unsalted so I can control the flavor.
2 cups heavy cream – I whip this to stiff peaks to give the filling its light and airy texture.
¾ cup granulated sugar – Sweetens the whipped cream just enough without making it overly sugary.
3 packages (8 oz each) cream cheese, softened to room temperature – This forms the creamy base of the cheesecake layer. Softening it ahead of time helps create a smooth filling.
1 package (3.4 oz) instant banana cream pudding mix – Adds banana flavor and helps set the cheesecake filling.
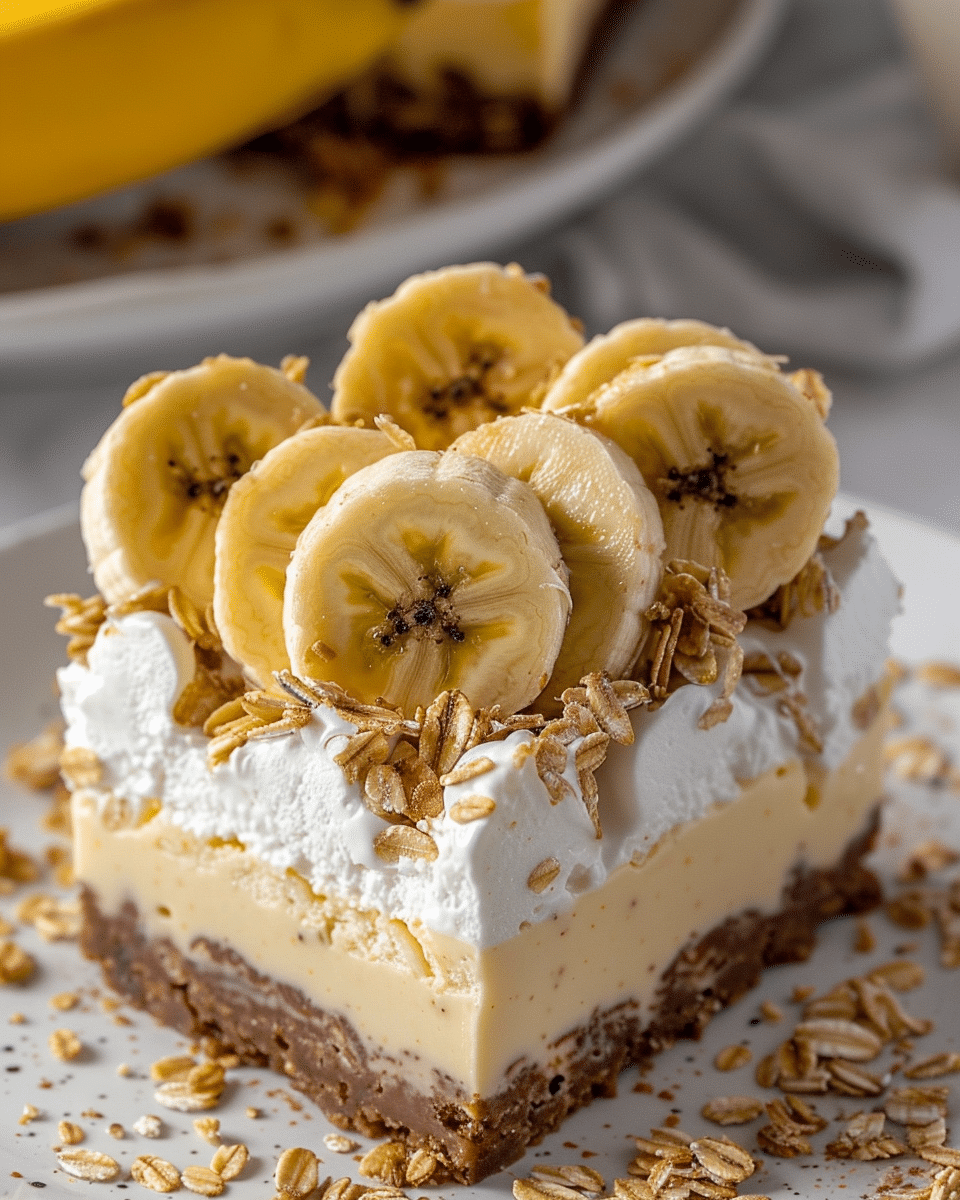
Whipped topping (optional, for garnish) – I like to add a dollop to each bar for a pretty, bakery-style finish.
Fresh banana slices (optional, for garnish) – These add a fresh touch on top, but I always add them right before serving to prevent browning.
Directions
I start by lining an 8×8-inch baking dish with parchment paper, leaving an overhang to lift the bars out easily later.
In a medium bowl, I mix the crushed vanilla wafer cookies with the melted butter until the crumbs are fully coated and resemble wet sand.
I press this mixture firmly and evenly into the bottom of the prepared baking dish, then place it in the refrigerator to chill while I prepare the filling.
Using a chilled mixing bowl, I beat the heavy cream and granulated sugar together until stiff peaks form. I set this aside.
In a separate large bowl, I beat the softened cream cheese until it’s smooth and creamy. Then I add the dry banana pudding mix and beat until fully incorporated.
I gently fold the whipped cream mixture into the cream cheese mixture, making sure not to deflate it. I keep folding until there are no visible streaks.
I spread the cheesecake filling evenly over the chilled crust, smoothing the top with a spatula. Then I cover the pan with plastic wrap and refrigerate it for at least 8 hours, or overnight, until fully set.
When I’m ready to serve, I use the parchment overhang to lift the bars out of the pan and place them on a cutting board. I cut them into squares and top each with whipped topping and banana slices, if desired.
Servings And Timing
Servings: 9 large bars Prep Time: 15 minutes Chill Time: 8 hours Total Time: 8 hours 15 minutes
Variations
Different Crust Options – I’ve used graham cracker crumbs, chocolate wafer cookies, and even crushed shortbread cookies when I want a change from vanilla wafers.
Chocolate Drizzle – I sometimes melt chocolate chips and drizzle them over the top before serving for a banana-chocolate combo.
Tropical Version – Adding shredded coconut or a splash of pineapple juice to the filling gives the bars a tropical twist.
Pudding Flavor Swap – I like to switch things up with vanilla, coconut cream, or cheesecake pudding mix instead of banana.
Lightened-Up Version – I’ve made a lower-calorie version using reduced-fat cream cheese, light whipped topping, and replacing half the cream with Greek yogurt.
Storage/Reheating
Refrigerator: I store the bars in an airtight container in the refrigerator for up to 3 days.
Freezer: I freeze ungarnished bars for up to 2 months. When I’m ready to serve them, I thaw them in the fridge overnight.
Serving Tips: I slice the bars using a sharp knife, wiping it clean between each cut for perfect edges. I always add the whipped topping and banana slices just before serving so everything stays fresh.
FAQs
Can I Use Cool Whip Instead Of Whipped Cream?
Yes, I can skip the whipping step and use about 4 cups of thawed Cool Whip. I fold it into the cream cheese and pudding mixture the same way I would with homemade whipped cream.
Can I Make This In A 9×13 Pan?
Yes, I’ve done it in a 9×13-inch dish, but the bars come out thinner unless I increase the filling ingredients by 50%.
Can I Use Homemade Pudding?
This recipe works best with instant pudding because it helps set the filling without baking. If I use homemade pudding, the bars will be softer and less structured.
Can I Use Other Cookie Crumbs For The Crust?
Absolutely. I’ve used graham crackers, Biscoff cookies, and chocolate wafers with great results. It just depends on the flavor I want to pair with the banana cheesecake layer.
How Do I Keep Banana Slices From Turning Brown?
I always add banana slices just before serving, but if I need to prep ahead, I lightly brush them with lemon juice to keep them from browning.
Conclusion
No Bake Banana Pudding Cheesecake Bars are one of those desserts I make once and then keep coming back to again and again. They’re rich and creamy, perfectly chilled, and full of that nostalgic banana pudding flavor I love. With no baking required, simple ingredients, and a silky filling, these bars are ideal for any occasion — from summer parties to holidays to weeknight cravings. Once I made them, they quickly became a favorite in my kitchen.
No Bake Banana Pudding Cheesecake Bars are a creamy, dreamy dessert with a crunchy vanilla wafer crust and a rich banana pudding–flavored cheesecake filling. Perfect for potlucks, summer gatherings, or an easy make-ahead treat with zero baking required.
Ingredients
1 box (about 11 oz) vanilla wafer cookies, crushed into fine crumbs
Line an 8×8-inch baking dish with parchment paper, leaving overhang for easy removal.
In a bowl, mix crushed vanilla wafer crumbs with melted butter until evenly coated. Press firmly into the bottom of the prepared pan. Refrigerate while preparing the filling.
In a chilled bowl, beat heavy cream and sugar until stiff peaks form. Set aside.
In another large bowl, beat softened cream cheese until smooth. Add dry banana pudding mix and beat until fully combined.
Gently fold whipped cream mixture into the cream cheese mixture until no streaks remain.
Spread filling evenly over chilled crust. Smooth the top and cover with plastic wrap.
Refrigerate at least 8 hours or overnight until fully set.
When ready to serve, lift out using parchment, slice into squares, and top with whipped topping and banana slices if desired.
Notes
Use a sharp knife and wipe between cuts for clean edges.
Add banana slices just before serving to prevent browning.
Store bars in the fridge for up to 3 days or freeze ungarnished for up to 2 months.
Cool Whip can replace whipped cream for convenience (about 4 cups).
Crust variations like graham crackers or Biscoff cookies work well too.


