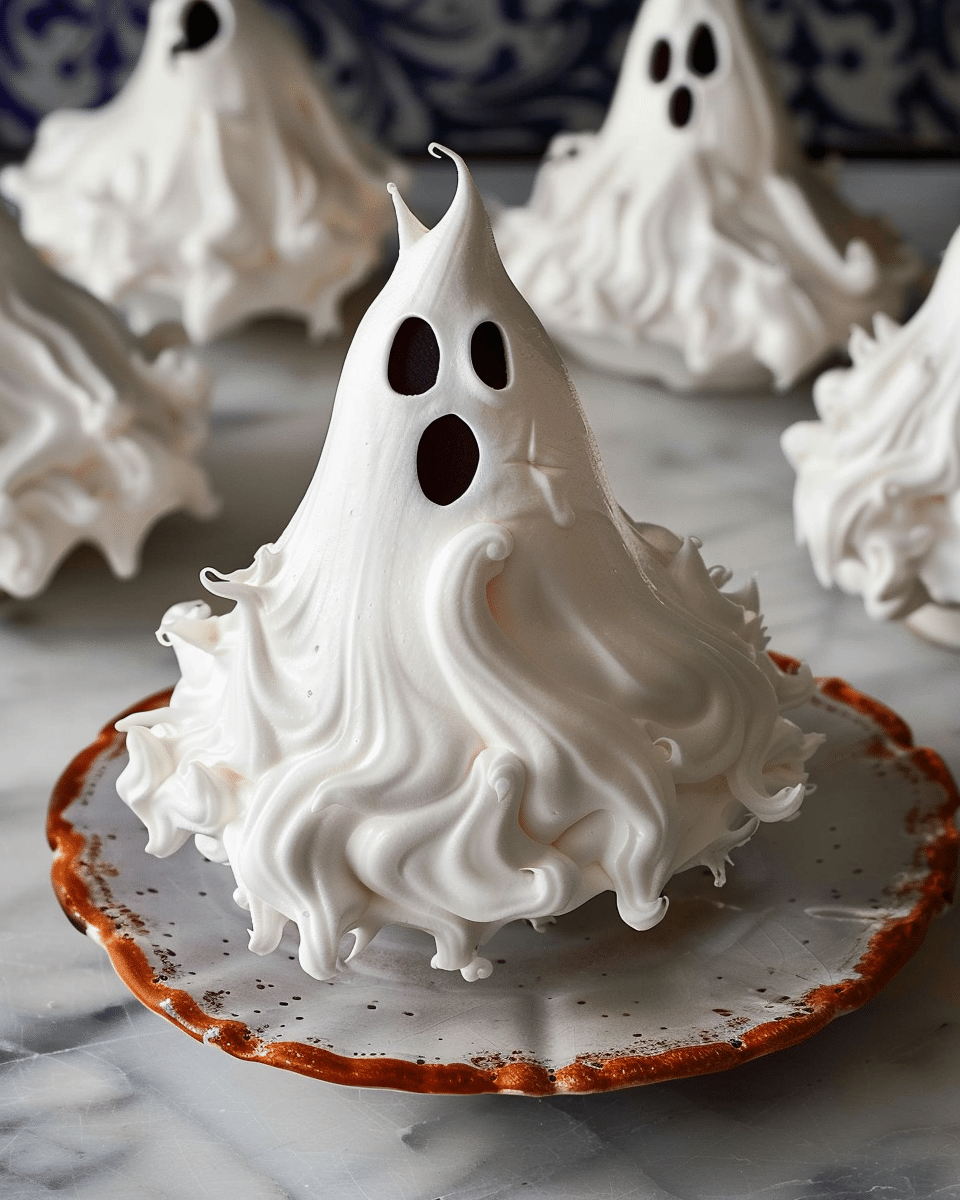
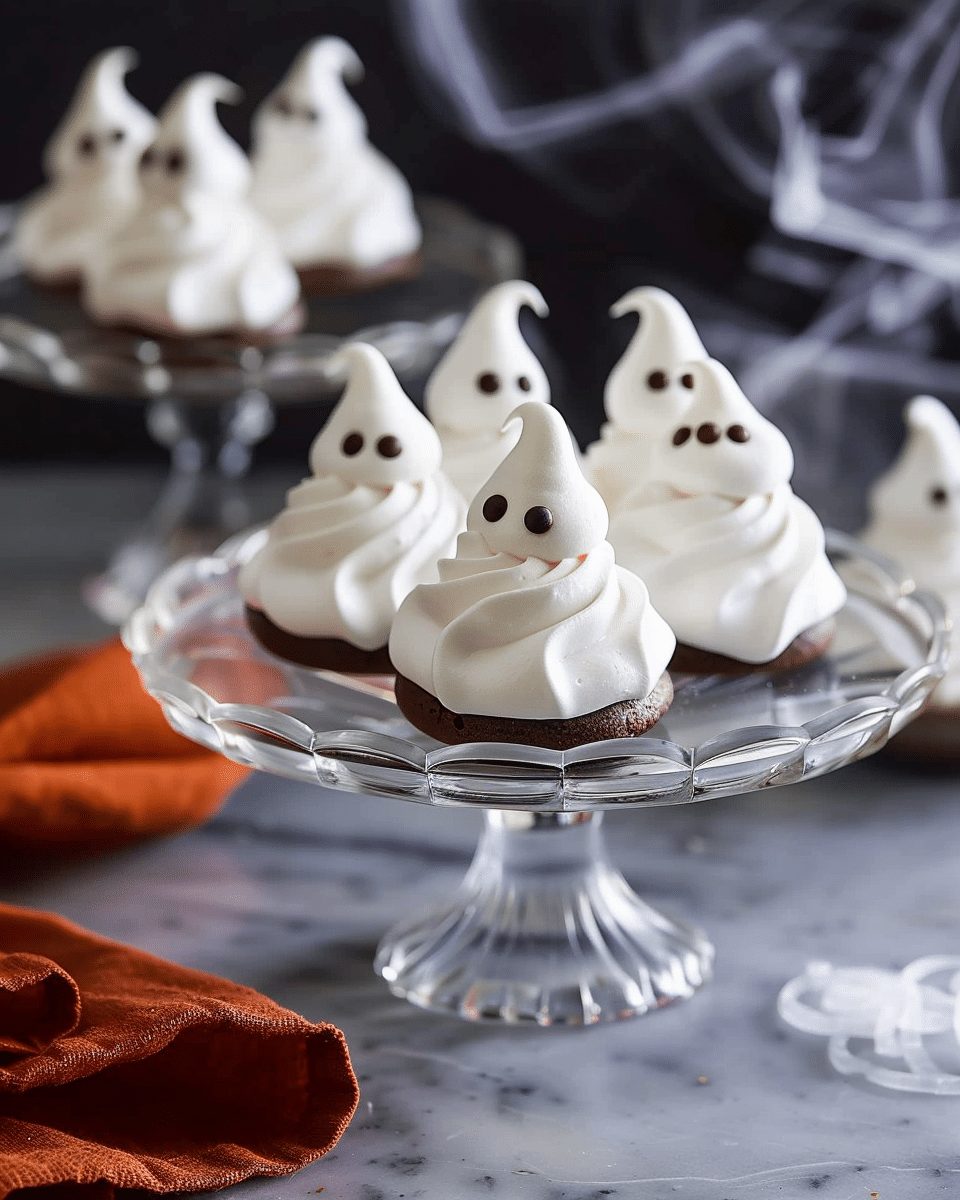
These meringue ghosts are a playful Halloween treat that look spooky but taste absolutely delightful. With a crisp, airy exterior and a slightly chewy inside, they melt in my mouth like sweet little clouds. I love that they’re naturally gluten-free, made with just seven simple ingredients, and fun to decorate with chocolate and sprinkles.
Why You’ll Love This Recipe
I like making these ghosts because they’re light, festive, and so easy to whip up. The meringues taste like marshmallow fluff and practically dissolve as soon as I take a bite. They’re naturally gluten-free, require only seven ingredients, and can be made ahead of time. The best part is decorating them—whether I dip them in chocolate, cover them in sprinkles, or give them silly little faces, they always bring smiles to the table.
Ingredients
(Here’s a tip: Check out the full list of ingredients and measurements in the recipe card below.)
-
2 egg whites, at room temperature
-
¼ teaspoon cream of tartar
-
⅛ teaspoon kosher salt
-
½ cup (95 g) baker’s sugar (or caster sugar)
-
½ teaspoon vanilla extract
-
1 cup (170 g) bittersweet chocolate chips (semi-sweet or milk chocolate works too)
-
Sprinkles for decorating (optional)
Directions
-
Preheat the oven to 225°F (110°C) and line two baking pans with parchment paper.
-
Add egg whites, cream of tartar, and salt to the bowl of a stand mixer. Whip on medium-high speed until the mixture is thick and foamy.
-
Gradually add the sugar, a tablespoon at a time, then increase to high speed. Whip until stiff, glossy peaks form. Stir in the vanilla.
-
Transfer the mixture to a piping bag fitted with a round tip (Wilton #12 is great). Pipe ghost shapes onto the prepared pans.
-
Bake for 1 hour, then turn off the oven and leave the meringues inside until completely cool to prevent cracks.
-
Melt the chocolate in 20-second intervals in the microwave, stirring in between. Dip the bottoms of the meringues in chocolate, then into sprinkles if desired.
-
Use remaining chocolate in a piping bag with a small tip (Wilton #2 works well) to draw eyes and a mouth. Let the chocolate set before serving.
Servings and timing
This recipe makes about 40 meringue ghosts. Prep time takes around 20 minutes, baking requires 1 hour, and cooling in the oven takes an additional 20 minutes or so. In total, I set aside about 1 hour and 20 minutes.
Variations
-
I sometimes swap the vanilla extract for almond or peppermint for a fun flavor twist.
-
For spookier ghosts, I skip the sprinkles and just use chocolate faces.
-
If I want them extra festive, I use colored sprinkles to match the theme of my party.
-
Dipping just the tops in chocolate instead of the bottoms also makes a unique look.
Storage/Reheating
I keep these ghosts stored in an airtight container at room temperature for up to 5 days. Since they’re delicate, I layer them between sheets of parchment paper. They don’t need reheating, but if they start to lose crispness, I can pop them in the oven at 200°F for about 10 minutes to refresh them.
FAQs
Do I really need cream of tartar?
Yes, cream of tartar stabilizes the egg whites and helps the ghosts hold their shape. If I don’t have it, I use ¼ teaspoon lemon juice or vinegar per egg white.
Can I use regular sugar instead of baker’s sugar?
I can use granulated sugar, but I add it slowly so it dissolves properly. Otherwise, the meringues may turn out grainy.
Are meringues supposed to be chewy or crunchy?
I love that they’re both! They should be crisp on the outside with a slightly chewy center.
Do meringues taste like eggs?
No, they taste sweet and fluffy, similar to marshmallow. The vanilla and sugar mask any egg flavor.
Can I make these ahead of time?
Yes, I often make them a day or two in advance. As long as I store them in an airtight container, they stay fresh and crisp.
Conclusion
I adore these meringue ghosts because they’re festive, light, and always a hit at Halloween gatherings. The decorating process is just as fun as eating them, and I love experimenting with different flavors and designs. Whether I make them for a party or just for fun, these little ghosts always bring smiles—and no one’s afraid to devour them.
Meringue Ghosts
5 Stars 4 Stars 3 Stars 2 Stars 1 Star
No reviews
- Author: Yusraa
- Total Time: 1 hour 20 minutes
- Yield: 40 meringue ghosts
- Diet: Gluten Free
Description
Light, airy, and spooky, these meringue ghosts are crisp on the outside, slightly chewy inside, and decorated with chocolate faces for a fun Halloween treat. Naturally gluten-free and made with just seven simple ingredients, they’re as festive as they are delicious.
Ingredients
- 2 egg whites, at room temperature
- 1/4 teaspoon cream of tartar
- 1/8 teaspoon kosher salt
- 1/2 cup (95 g) baker’s sugar (or caster sugar)
- 1/2 teaspoon vanilla extract
- 1 cup (170 g) bittersweet chocolate chips (semi-sweet or milk chocolate works too)
- Sprinkles for decorating (optional)
Instructions
- Preheat oven to 225°F (110°C) and line two baking pans with parchment paper.
- In a stand mixer, whip egg whites with cream of tartar and salt on medium-high speed until thick and foamy.
- Gradually add sugar, a tablespoon at a time, then increase speed to high. Whip until stiff, glossy peaks form. Stir in vanilla extract.
- Transfer mixture to a piping bag fitted with a round tip and pipe ghost shapes onto the prepared pans.
- Bake for 1 hour, then turn off oven and leave meringues inside until fully cool.
- Melt chocolate in 20-second microwave intervals, stirring in between.
- Dip bottoms of cooled meringues into melted chocolate, then into sprinkles if desired.
- Use remaining melted chocolate to pipe ghost faces. Let set before serving.
Notes
- Swap vanilla extract for almond or peppermint extract for a flavor twist.
- Use only chocolate for spooky ghost faces without sprinkles.
- Dip tops instead of bottoms for a unique design.
- Store in an airtight container at room temperature for up to 5 days.
- If meringues lose crispness, reheat at 200°F for 10 minutes to refresh.
- Prep Time: 20 minutes
- Cook Time: 1 hour
- Category: Dessert
- Method: Baking
- Cuisine: American
Nutrition
- Serving Size: 1 ghost
- Calories: 30
- Sugar: 5g
- Sodium: 10mg
- Fat: 1g
- Saturated Fat: 0.5g
- Unsaturated Fat: 0.3g
- Trans Fat: 0g
- Carbohydrates: 6g
- Fiber: 0g
- Protein: 0.5g
- Cholesterol: 0mg

