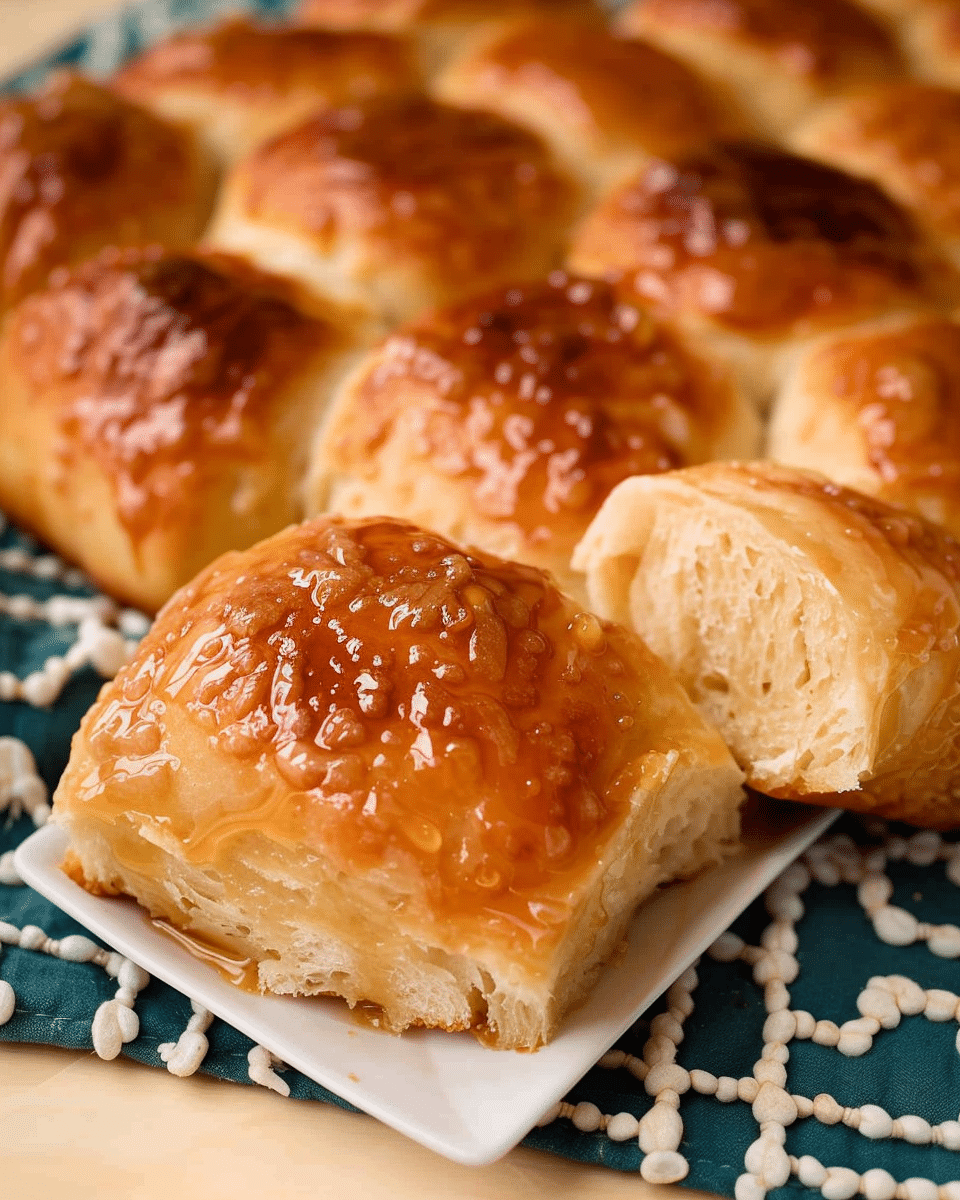
These Honey Butter Rolls are soft, fluffy, and slightly sweet with a rich, buttery finish that melts in my mouth. Made with just seven simple ingredients, these rolls are perfect for holidays or any cozy dinner at home. They’re easy to make, even if I’m new to working with yeast, and the addition of honey—both in the dough and as a glaze on top—elevates the flavor to something truly special. Whether I serve them with a warm soup or a holiday roast, they’re always a crowd-pleaser.
Why You’ll Love This Recipe
I love how tender and flavorful these rolls turn out every single time. The combination of milk, eggs, butter, and honey creates a rich dough that bakes into golden, pillowy-soft rolls. The kneading process, while therapeutic, gives them that perfect chewy structure I expect from bakery-style bread. And the honey butter topping? It’s the finishing touch that takes them from great to unforgettable. I also appreciate that the dough is very forgiving, and I can make it ahead of time if needed.
Ingredients
(Tip: You’ll find the full list of ingredients and measurements in the recipe card below.)
For The Dough:
1 cup (240 ml) whole milk, warmed to about 110°F (43°C)
2 and 1/4 teaspoons (7 g) instant or active dry yeast (1 standard packet)
1/4 cup (85 g) plus 1 teaspoon honey, divided
1 large egg
1 egg yolk
1/4 cup (4 tablespoons or 56 g) unsalted butter, melted and slightly cooled
3 and 1/2 cups (455 g) bread flour, spooned and leveled (can also use all-purpose flour)
1 teaspoon salt
For The Honey Butter Topping:
1/4 cup (4 tablespoons or 56 g) unsalted butter, very soft
2 tablespoons (42 g) honey
Directions
I start by whisking the warm milk, yeast, and 1 teaspoon of honey together in a mixing bowl. I cover it lightly and let it sit for 5–10 minutes until the mixture becomes frothy on top. This tells me the yeast is active and ready.
Once the yeast is activated, I add the remaining honey, egg, egg yolk, melted butter, 3 cups of the flour, and salt to the bowl. I mix on low speed for about 1 minute, then add the remaining 1/2 cup of flour and continue mixing until the dough starts to pull away from the sides of the bowl. The dough should be thick, soft, and just slightly sticky. If it feels too sticky, I add flour 1 tablespoon at a time until it reaches the right consistency.
I knead the dough for 8–10 minutes. When using a stand mixer, I let the dough hook do the work. If kneading by hand, I turn the dough onto a lightly floured surface and use the heels of my hands to stretch and fold it repeatedly. The dough should be elastic and smooth. I know it’s ready when it slowly bounces back after poking it or when it passes the windowpane test.
I place the kneaded dough into a greased bowl, turning it to coat all sides, then cover it with a towel or plastic wrap. I let it rise in a warm area for 1–2 hours until it doubles in size.
After the first rise, I punch down the dough to release air. I divide it into 15 equal pieces, roughly 2 ounces (60 g) each, and shape each into a smooth ball by tucking the edges underneath and sealing the bottom.
I arrange the shaped rolls in a greased 9×13-inch baking pan or two 9-inch pans, then loosely cover and let them rise again for about 1 hour until puffy and nearly doubled in size.
I preheat my oven to 350°F (177°C). I bake the rolls for 20–25 minutes until the tops are golden brown, rotating the pan halfway through. If the tops brown too quickly, I loosely tent the pan with foil.
While the rolls bake, I prepare the honey butter by mixing the very soft butter with the honey until smooth and creamy. As soon as the rolls come out of the oven, I spread the honey butter over the tops. I like to be generous here—it melts into the rolls and adds a shiny, flavorful finish.
Servings And Timing
Servings: 15 rolls
Prep Time: 3 hours 25 minutes
Cook Time: 22 minutes
Total Time: Approximately 3 hours 45 minutes
Variations
I sometimes substitute up to 1 cup of the bread flour with whole wheat flour for a slightly nutty, wholesome variation. It makes the rolls a bit denser but still delicious.
For a sweeter version, I’ve added 1/2 teaspoon of ground cinnamon to the dough for a subtle, warm flavor.
I love mixing in fresh rosemary or garlic powder for a savory take that pairs beautifully with the honey.
When I want smaller rolls for sliders or appetizers, I divide the dough into 20–24 mini balls and bake as directed.
Storage/Reheating
I store the baked rolls in an airtight container in the refrigerator for up to 1 week. To reheat, I place them in a 300°F (149°C) oven for about 10 minutes until warmed through. For freezing, I let the baked rolls cool completely, then freeze them for up to 3 months. When ready, I thaw them overnight in the refrigerator or at room temperature, then reheat in the oven. The unbaked dough balls can also be frozen after shaping—just let them thaw and rise for 4–5 hours before baking.
FAQs
Can I Make These Rolls Ahead Of Time?
Yes, I often make them ahead. After shaping, I refrigerate them overnight, then let them rise at room temperature for 1–2 hours before baking.
What’s The Best Way To Knead If I Don’t Have A Stand Mixer?
I knead the dough by hand on a lightly floured surface, using the heels of my hands to push and fold the dough repeatedly for 8–10 minutes until it becomes soft and elastic.
Can I Use All-Purpose Flour Instead Of Bread Flour?
Yes, both work well. I prefer bread flour for a chewier texture, but all-purpose flour still gives soft, fluffy rolls.
Do I Have To Use Whole Milk?
I get the best flavor and texture using whole milk, but I’ve had success with lower-fat and non-dairy options like almond or oat milk when needed.
Why Did My Dough Turn Out Too Sticky?
Humidity, brand of flour, or slight measurement differences can affect the dough. If it’s too sticky, I add extra flour 1 tablespoon at a time until it’s manageable but still soft.
Conclusion
These Honey Butter Rolls are my go-to when I want something warm, buttery, and made from scratch. They’re easy enough for weeknight dinners and impressive enough for holiday tables. The sweet honey flavor combined with the rich, tender dough makes them unforgettable. Whether I serve them fresh out of the oven or reheat them the next day, they never last long. This is the kind of recipe I keep in my back pocket for whenever I want homemade comfort with a touch of indulgence.
These Honey Butter Rolls are soft, fluffy, and lightly sweetened with honey, both in the dough and brushed on top as a glaze. Perfect for holidays or cozy dinners, these rolls have a rich, buttery finish that melts in your mouth. Made with simple ingredients and beginner-friendly steps, they deliver bakery-style results every time.
Ingredients
1 cup (240 ml) whole milk, warmed to 110°F (43°C)
2 1/4 teaspoons (7 g) instant or active dry yeast
1/4 cup (85 g) plus 1 teaspoon honey, divided
1 large egg
1 egg yolk
1/4 cup (56 g) unsalted butter, melted and slightly cooled
3 1/2 cups (455 g) bread flour or all-purpose flour
1 teaspoon salt
1/4 cup (56 g) unsalted butter, very soft (for topping)
2 tablespoons (42 g) honey (for topping)
Instructions
In a large mixing bowl, whisk warm milk, yeast, and 1 teaspoon honey. Cover and let sit for 5–10 minutes until foamy.
Add remaining honey, egg, egg yolk, melted butter, 3 cups flour, and salt. Mix on low speed or by hand until combined.
Add remaining 1/2 cup flour and mix until dough pulls away from the sides. Dough should be soft and slightly sticky. Add more flour 1 tablespoon at a time if needed.
Knead dough for 8–10 minutes until smooth and elastic. Use a dough hook or knead by hand on a lightly floured surface.
Place dough in a greased bowl, turn to coat, and cover. Let rise in a warm place for 1–2 hours until doubled in size.
Punch down dough and divide into 15 equal pieces (about 60 g each). Shape each into a smooth ball by tucking and sealing the bottom.
Arrange rolls in a greased 9×13-inch pan or two 9-inch pans. Cover and let rise for 1 hour until puffy.
Preheat oven to 350°F (177°C). Bake rolls for 20–25 minutes until golden brown, rotating pan halfway through. Tent with foil if browning too fast.
Mix soft butter and honey for topping. Brush generously over hot rolls immediately after baking.
Serve warm or cool and store for later.
Notes
Bread flour gives a chewier texture; all-purpose flour also works well.
Use whole milk for best results, but non-dairy alternatives like almond or oat milk are acceptable.
Dough can be prepared and refrigerated overnight after shaping—let rise before baking.
For a savory twist, add garlic powder or chopped rosemary to the dough.
To test if dough is kneaded enough, use the windowpane test or poke test for elasticity.


