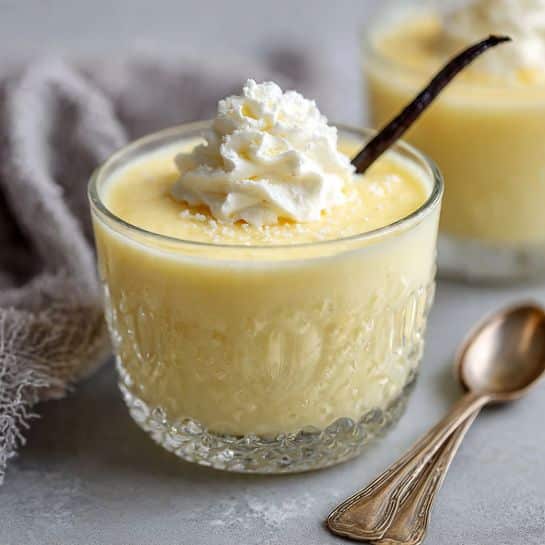
These homemade vanilla pudding cups are smooth, creamy, and full of classic vanilla flavor. Made from simple pantry staples, they are a comforting dessert that feels special while still being easy enough for everyday enjoyment. Served in individual cups, they are perfect for family treats, gatherings, or make-ahead desserts.
Why You’ll Love This Recipe
This recipe delivers a rich and creamy texture with a deep, authentic vanilla taste that far surpasses store-bought pudding. It comes together quickly on the stovetop with basic ingredients you likely already have. The pudding sets beautifully in the refrigerator, making it ideal for preparing in advance. Serving it in individual cups makes portioning easy and adds a fun, charming presentation. It is also versatile, allowing you to customize toppings and flavors to suit any occasion.
Ingredients
(Tip: You’ll find the full list of ingredients and measurements in the recipe card below.)
3/4 cup granulated sugar
3 tablespoons cornstarch
1/8 teaspoon salt
3 1/2 cups half-and-half
3 large egg yolks
1 tablespoon unsalted butter
1 tablespoon vanilla extract
Directions
In a medium saucepan, add the sugar, cornstarch, and salt, then whisk well to combine.
Slowly pour in the half-and-half while whisking constantly to prevent lumps from forming.
Add the egg yolks and continue whisking until the mixture is smooth and fully combined.
Place the saucepan over medium-high heat and bring the mixture to a gentle simmer, whisking constantly but gently.
Reduce the heat to medium and cook for about 2 minutes, stirring continuously, until the pudding thickens and coats the back of a spoon.
Remove the saucepan from the heat and stir in the butter and vanilla extract until fully incorporated.
Carefully pour the hot pudding into six individual cups or jars, leaving a little space at the top.
Cover and refrigerate for about 3 hours, or until fully set.
Serve chilled, directly from the cups, with toppings if desired.
Servings and timing
This recipe makes 6 individual servings.
Preparation time is about 5 minutes.
Cooking time is approximately 7 minutes.
Chilling time is around 3 hours.
Variations
For a lighter version, you can replace the half-and-half with 3 cups of whole milk, keeping the pudding slightly less rich but still creamy.
Add a touch of warmth by stirring in a pinch of cinnamon or nutmeg along with the vanilla.
For a different flavor profile, replace half of the vanilla extract with almond extract.
Top the pudding with fresh fruit, toasted nuts, or a swirl of whipped cream just before serving.
Storage/Reheating
Store the pudding cups covered or in airtight containers in the refrigerator for up to 3 days. The pudding is best enjoyed cold and does not require reheating. Freezing is not recommended, as it can negatively affect the smooth texture and cause the pudding to become grainy once thawed.
FAQs
How long does homemade vanilla pudding take to set?
It usually takes about 3 hours in the refrigerator for the pudding to fully set and become firm.
Why did my pudding turn out lumpy?
Lumps often form if the mixture is not whisked constantly while heating. Continuous gentle whisking helps keep the texture smooth.
Can I use milk instead of half-and-half?
Yes, whole milk can be used, though the pudding will be slightly less rich and creamy.
How do I know when the pudding is thick enough?
The pudding is ready when it coats the back of a spoon and holds a clear line when you run your finger through it.
Can I make this pudding ahead of time?
Yes, this pudding is perfect for making ahead and can be prepared up to 3 days in advance.
Is this pudding served warm or cold?
It can be tasted warm, but it is best served cold after it has fully set in the refrigerator.
Can I strain the pudding for extra smoothness?
Yes, straining the pudding through a fine-mesh sieve before chilling can remove any small lumps and create a silkier texture.
Can I make this recipe without eggs?
Egg yolks are important for the classic texture and richness, so removing them will significantly change the result.
What containers work best for pudding cups?
Small glass jars, ramekins, or dessert cups all work well for individual servings.
Can I double the recipe?
Yes, the recipe can be doubled easily. Just use a larger saucepan and maintain constant whisking while cooking.
Conclusion
Homemade vanilla pudding cups are a simple yet satisfying dessert that showcases how a few basic ingredients can create something truly comforting. With their creamy texture, rich vanilla flavor, and easy preparation, they are a wonderful alternative to packaged desserts and a recipe you will want to make again and again.
These homemade vanilla pudding cups are smooth, creamy, and full of rich vanilla flavor. Made with simple pantry staples and served in individual portions, they’re a comforting dessert perfect for any occasion.
Ingredients
3/4 cup granulated sugar
3 tablespoons cornstarch
1/8 teaspoon salt
3 1/2 cups half-and-half
3 large egg yolks
1 tablespoon unsalted butter
1 tablespoon vanilla extract
Instructions
In a medium saucepan, whisk together sugar, cornstarch, and salt.
Slowly whisk in the half-and-half until smooth.
Add the egg yolks and whisk until fully combined.
Place saucepan over medium-high heat and bring to a gentle simmer, whisking constantly.
Reduce heat to medium and continue to stir for about 2 minutes, until the mixture thickens and coats the back of a spoon.
Remove from heat and stir in butter and vanilla extract.
Pour the hot pudding into 6 individual cups or jars, leaving some space at the top.
Cover and refrigerate for 3 hours or until fully set.
Serve chilled, plain or with desired toppings.
Notes
Strain the pudding before chilling for extra smooth texture.
Replace half the vanilla with almond extract for a flavor twist.
Top with fresh fruit, whipped cream, or nuts before serving.
Whole milk can be used instead of half-and-half for a lighter pudding.


