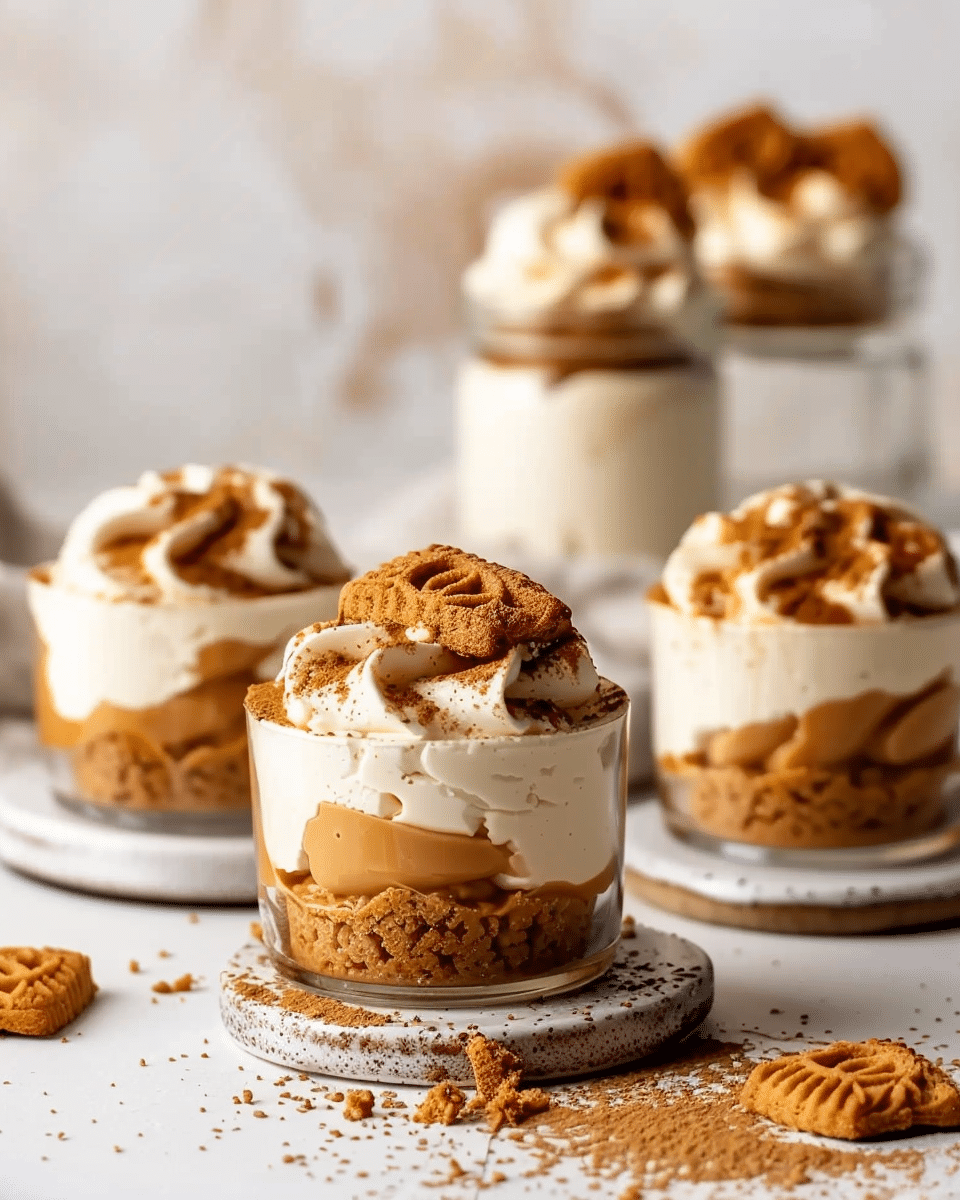
Creamy, indulgent, and rich with the signature caramelized flavor of Biscoff cookies, these easy no‑bake Biscoff cheesecake cups are the ultimate individual desserts. Made with just a handful of ingredients and no oven required, they’re perfect for entertaining, special occasions, or simply satisfying your sweet tooth. Each jar features layers of melted cookie butter, a fluffy cream cheese filling, and a smooth Biscoff topping with a final touch of crushed cookies.
Why You’ll Love This Recipe
No baking necessary — great for warm weather or quick prep.
Only a few pantry staples required.
Perfect make-ahead dessert for guests.
Individually portioned for easy serving and presentation.
Full of creamy, spiced cookie butter flavor.
Elegant but incredibly easy to prepare.
Layers offer rich texture contrast: creamy, smooth, and a bit crunchy.
Ideal dessert for Biscoff lovers.
Customizable with toppings and mix-ins.
Can be made in under 15 minutes (plus chilling time).
Ingredients
(Tip: You’ll find the full list of ingredients and measurements in the recipe card below.)
For the Biscoff Base
8 tablespoons smooth Biscoff spread (divided into 2 tablespoons per dessert cup) This melted spread creates a rich, flavorful base layer in each jar.
For the Whipped Biscoff Cheesecake Filling
¾ cup heavy cream (must be at least 33% fat content) Whipped to stiff peaks, this provides the light and airy structure of the cheesecake layer.
7 ounces full-fat cream cheese, softened to room temperature Delivers the classic cheesecake richness and helps stabilize the filling.
½ cup smooth Biscoff spread Blended with the cream cheese for deep cookie butter flavor throughout.
For the Topping
8 to 12 tablespoons smooth Biscoff spread, melted This glossy top layer gives each cup a beautiful finish and extra decadence.
6 to 8 Biscoff cookies, crushed Adds a bit of crunch and contrast on top before serving.
Directions
Chill the mixing bowl: Place a metal mixing bowl in the freezer for 10 minutes. This helps the cream whip faster and hold its structure.
Whip the cream: Remove the chilled bowl from the freezer, pour in the heavy cream, and whip using a hand mixer. Start on low speed, then increase to medium-high. Beat until stiff peaks form. Set aside.
Make the cheesecake base: In a separate bowl, beat the softened cream cheese with ½ cup of Biscoff spread until the mixture is completely smooth. Don’t overmix, as it can loosen the structure.
Combine cream and filling: Gently fold the whipped cream into the cream cheese and Biscoff mixture in two batches. This keeps the mixture airy and smooth. Chill it while preparing the jars.
Prepare the jars: Melt 8 tablespoons of Biscoff spread until smooth (10–15 seconds in the microwave or over a double boiler). Add 2 tablespoons to the bottom of each dessert jar or cup, swirling slightly to coat the base.
Add the cheesecake filling: Spoon or pipe the whipped cheesecake mixture into each jar on top of the melted Biscoff layer. Leave a bit of room at the top for the final layer.
Top with melted Biscoff: Melt another 8–12 tablespoons of Biscoff spread. Spoon 2–3 tablespoons over each cheesecake layer, letting it settle into a smooth, glossy finish.
Chill: Place the jars in the refrigerator for at least 1 hour to allow the layers to set.
Garnish and serve: Before serving, sprinkle crushed Biscoff cookies on top. Optionally, drizzle with more melted Biscoff spread for an elegant finish.
Servings and timing
Servings: Makes 4 individual dessert cups (using approximately 220 ml / 7.4 oz jars)
Prep time: 10 minutes
Chill time: 1 hour
Total time: 1 hour 10 minutes
Variations
Crunchy Base Alternative: Replace the melted Biscoff base with a layer of crushed Biscoff cookies mixed with melted butter for a textured crust.
Chocolate Twist: Add a layer of melted white chocolate between the cheesecake and topping for added sweetness.
Whipped Cream Garnish: Pipe a swirl of whipped cream over the top and dust with cinnamon or nutmeg.
Biscoff Swirl: Gently swirl some extra Biscoff spread into the cheesecake layer before chilling for a marbled look.
Mini Cheesecakes: Use mini muffin cups or silicone molds to create bite-sized versions of this dessert.
Fruit Addition: Add a thin layer of sliced bananas or strawberries above the cheesecake layer before the topping.
Storage/Reheating
Refrigerator: Store the assembled jars covered in the fridge for up to 4 days.
Freezer: Not recommended — the creamy texture may change after freezing and thawing.
Make-ahead tip: Prepare the dessert the night before and add the crushed cookie topping just before serving to preserve crunch.
Reheating: Not applicable. This dessert is meant to be served chilled.
FAQs
What kind of jars or cups work best?
Clear glass jars or cups holding about 220 ml (7.4 oz) are ideal. This size allows for visible layers and perfect single servings.
Can I use low-fat cream cheese?
You can, but the texture will be softer and less rich. Full-fat cream cheese gives the best result in both flavor and structure.
Do I have to whip the cream separately?
Yes. Whipping the cream before folding it in gives the cheesecake filling its light and fluffy texture. Skipping this step will make the filling denser.
Is this dessert overly sweet?
Despite the cookie butter and cream, it’s well-balanced. If you prefer less sweetness, reduce the Biscoff spread slightly or skip the final topping layer.
Can I use crunchy Biscoff spread instead of smooth?
Yes, but the texture will be slightly gritty and less creamy. It can add a fun crunch if you prefer that variation.
How far in advance can I make these?
You can make them up to 2 days in advance. Add crushed cookies just before serving to avoid them getting soggy.
Can I add a cookie crust instead of melted Biscoff?
Yes. Mix crushed Biscoff cookies with melted butter and press into the bottom of each jar for a classic cheesecake-style base.
Can I make this recipe vegan?
Yes, by using dairy-free cream cheese and a plant-based whipped topping. Make sure all substitutes are unsweetened and unflavored to match the original taste.
Why is my cheesecake mixture too soft?
This can happen if the cream wasn’t whipped to stiff peaks or if the filling was overmixed. Make sure ingredients are properly measured and mixed gently.
Can I substitute Biscoff spread with another cookie butter?
Yes, you can use any cookie butter, such as Trader Joe’s Speculoos. However, flavors and textures may vary slightly.
Conclusion
These no‑bake Biscoff cheesecake cups are a rich, creamy dessert that combines the beloved flavor of cookie butter with the lightness of whipped cheesecake. They’re incredibly easy to make, look elegant in single-serve jars, and offer the perfect sweet finish for any occasion. Whether you’re preparing for guests or craving something indulgent, these cups will satisfy every time. Try them once and they’re sure to become a favorite in your dessert rotation.
Creamy, indulgent no-bake Biscoff cheesecake cups layered with melted cookie butter, fluffy cream cheese filling, and a glossy Biscoff topping. Finished with crushed cookies, these individual desserts are quick, elegant, and perfect for entertaining or satisfying a sweet craving.
Ingredients
8 tablespoons smooth Biscoff spread (2 tablespoons per cup for the base)


